How to Install Magento 2 Extension
Extensions include:
- Modules (extend Magento capabilities)
- Themes (change the look and feel of your storefront and Admin)
- Language packages (localize the storefront and Admin)
Prior to installation, you may want to:
- Back up your database.
- Enable maintenance mode:
Important
It's very important to backup all of themes and extensions in Magento before installation, especially when you are working on a live server. We strongly recommend you to do not omit this step.
bin/magento maintenance:enableTo install an extension, you must:
- Get an extension from the Commerce Marketplace or another extension developer.
- If you install an extension from the Commerce Marketplace, make
sure that the
repo.magento.com repository exists in your
composer.jsonfile:$ "repositories": [
{
"type": "composer",
"URL": "https://repo.magento.com/"
}
] - Get the extension's Composer name and version.
- Update the
composer.jsonfile in your Magento project with the name and version of the extension. - Verify that the extension installed properly.
- Enable and configure the extension.
Step 1: Upload the Magento 2 Extension Files to Your Server
Log in to your Magento server as the file system owner.
Upload the .zip archive file to a new folder inside your user's home directory using SSH or SFTP

Step 2: Extract the .zip Extension File
Extract the .zip extension file into a new folder called extension using:
$ unzip archive.zip -d /home/magento/extensionOnce you finish the extension installation process, you can delete this folder using:
$ rm -R /home/magento/extensionStep 3: Verify and Copy the Magento Extension Files Into the app/code Folder
Verify the extracted component file structure meets Magento's required vendor/module-name format.
Navigate to the Magento project root directory and copy the extension files to the app/code folder using:
$ cp -R /home/magento/extension/* app/codeThe app/code directory doesn't exist in the default Magento filesystem. If this is your first attempt to install a Magento extension manually, create the directory using:
$ mkdir app/codeStep 4: Register the Magento 2 Extension and Check Its Status
Complete the Magento 2 extension installation process by executing:
$ php bin/magento setup:upgrade$ php bin/magento setup:di:compile$ php bin/magento setup:static-content:deploy -fThe setup:upgrade command registers the Magento 2 extension and updates the Magento database schema and data. The subsequent commands compile Magento code and deploy static view files.
Note: You don't need to deploy static view files in developer mode unless your extension developer's documentation mandates it.
Verify the status of the extension:
$ php bin/magento module:status MpdExtensions_EXTENSION_NAMEIf it's disabled, you can enable it using:
$ php bin/magento module:enable MpdExtensions_EXTENSION_NAME --clear-static-contentStep 5: Clear Magento Cache and Disable Maintenance Mode
Clear the Magento cache using:
$ php bin/magento cache:clean$ php bin/magento cache:flushFollow Adobe's guide to set permissions for a production file system. Then, disable maintenance mode using:
$ php bin/magento maintenance:disableNice work! You've learned how to install a Magento 2 extension using a .zip file.
How To Install a Magento 2 Extension With Composer
Before we show you how to install a Magento 2 extension via Composer, make sure you:
- Back up your server.
- Set pre-install file permissions.
- Enable developer mode.
- Put Magento in maintenance mode.
Once you've met the above conditions, follow our installation guide.
Step 1: Obtain the Extension's Composer Name and Version
Log in to your Magento Marketplace account and navigate to [Your name] > My Profile.

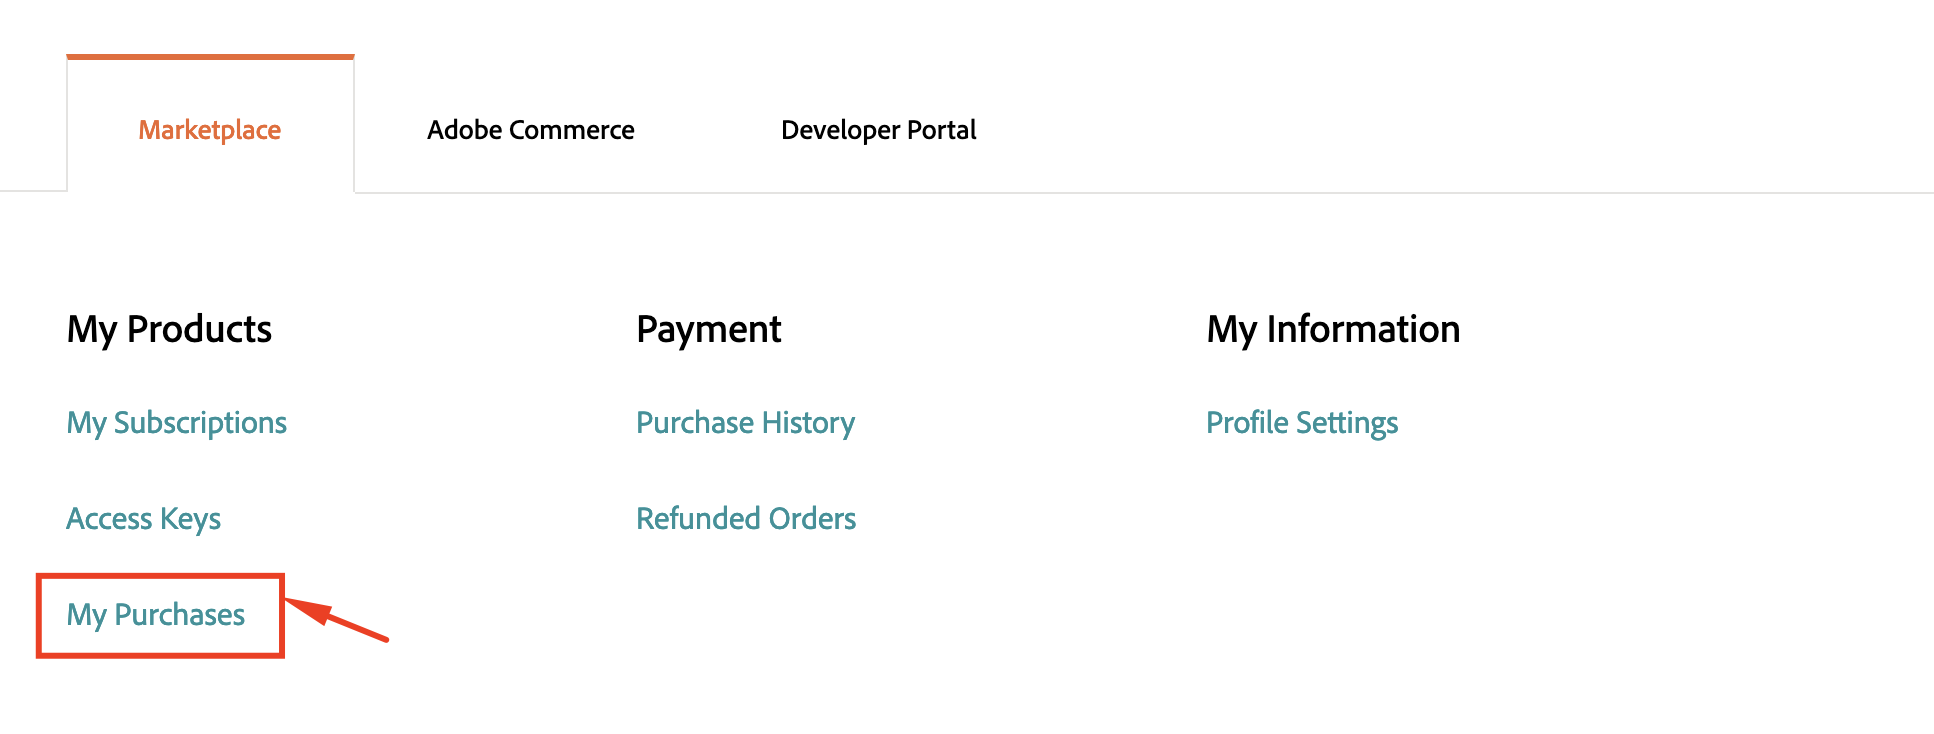
Go to Marketplace > My Products and click My Purchases.

Locate the Magento 2 extension you want to install and note its Component Name.
Click on the Versions available dropdown and note the version number to install a specific version.
Step 2: Update the Magento composer.json File
Log in to your Magento server as the file system owner and navigate to the Magento root folder to install the module via Composer.
Update the composer.json file from the command line interface (CLI) using:
$ composer require component-name:versionReplace "component-name" and “version” with the values obtained in the previous step. For example:
If prompted to enter access keys, copy and paste your public key as the username and private key as the password.
Wait for Composer to update the Magento project dependencies. In case of errors, address them before proceeding.
Step 3: Register the Extension and Clear Magento Cache
Run the following commands to register the Magento 2 extension, compile code, and deploy static view files:
$ php bin/magento setup:upgrade$ php bin/magento setup:di:compileClear the Magento cache by executing:
$ php bin/magento cache:clean$ php bin/magento cache:flushStep 4: Check the Magento 2 Extension Status
Verify the extension status:
$ php bin/magento module:status MpdExtensions_EXTENSION_NAMEIf disabled, enable the extension:
$ php bin/magento module:enable MpdExtensions_EXTENSION_NAMEStep 5: Update File Permissions and Disable Maintenance Mode
Set file permissions for a production file system based on your hosting setup. Then, disable maintenance mode as follows:
$ php bin/magento maintenance:disableUninstallation 
Important : Backup Code, database before doing this.
In Magento 2, there are primarily two ways to uninstall a module: using Composer and manually removing the module files from the codebase. Let's go through both methods step by step:
Method 1: Uninstalling a Module using Composer
Go to Magento root folder and run uninstall command
$ composer remove MpdExtensions/module-name$ php bin/magento setup:upgrade$ php bin/magento setup:static-content:deploy
Method 2: Manually Removing the Module Files from Codebase
Navigate to Module Directory: Navigate to the app/code directory in your Magento root like app/code/MpdExtensions/EXTENSION_NAME then delete the Module.
upgrade and Clear Cache: After removing the module, clear the Magento cache:
$ php bin/magento setup:upgrade$ php bin/magento cache:cleanDelete database tables: (Optional)
Open a Mysql management such as PHPMyAdmin
Open your database > Find database with prefix:
MpdExtensions_EXTENSION_NAME
Just delete all the database tables related to
MpdExtensions_EXTENSION_NAME
If you have any questions, feel free to contact us at https://www.mpdextensions.com/
